Mimecast
Configuring a Mimecast Plugin
Creating an API Application
To begin, log into Mimecast.
For the Mimecast account associated with the API:
- Verify that you have a Mimecast administrator account with the Gateway | Tracking | Read permissions enabled.
- Ensure that the account you’re going to use to authenticate is in the Basic Administrators group in Mimecast.

When prompted to select an app, select the "Administration Console".
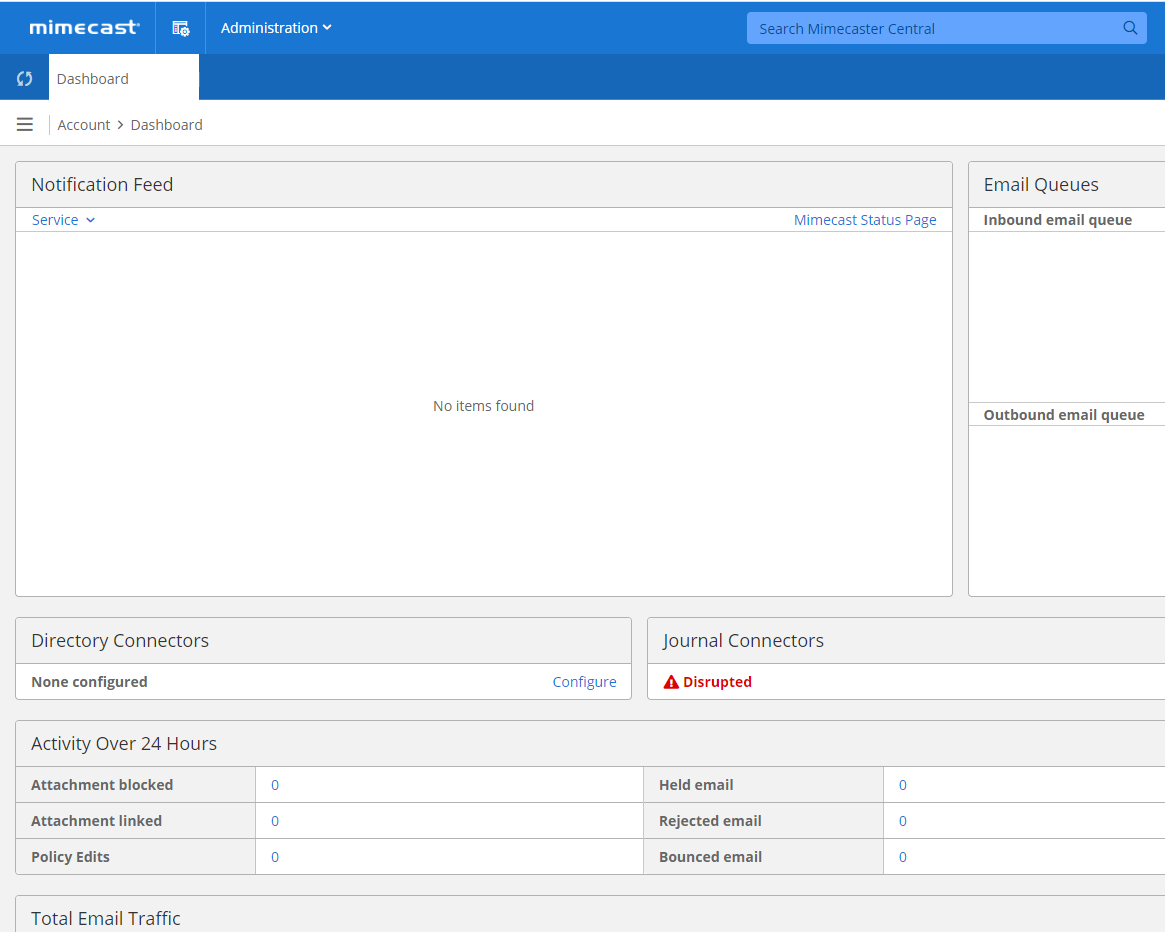
This brings you to the administration dashboard.
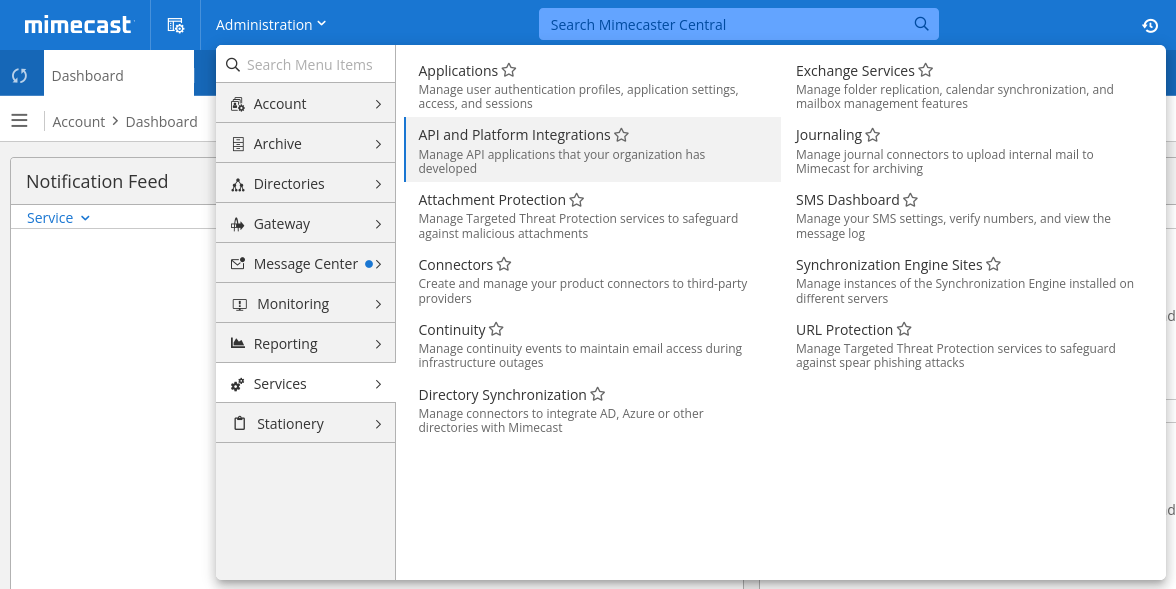
Using the drop-down menu that reads "Administration," navigate to the "Services" tab and select "API and Platform Integrations".
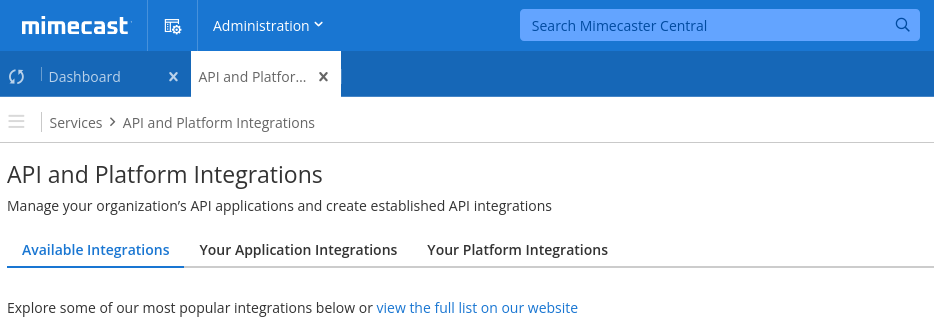
Scroll down and select the "Fluency Security" SIEM integration. Click on the "Generate Keys" button.
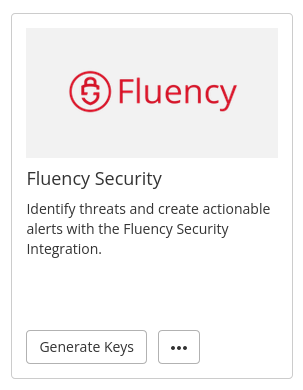
This will take you through the steps of adding an API application.
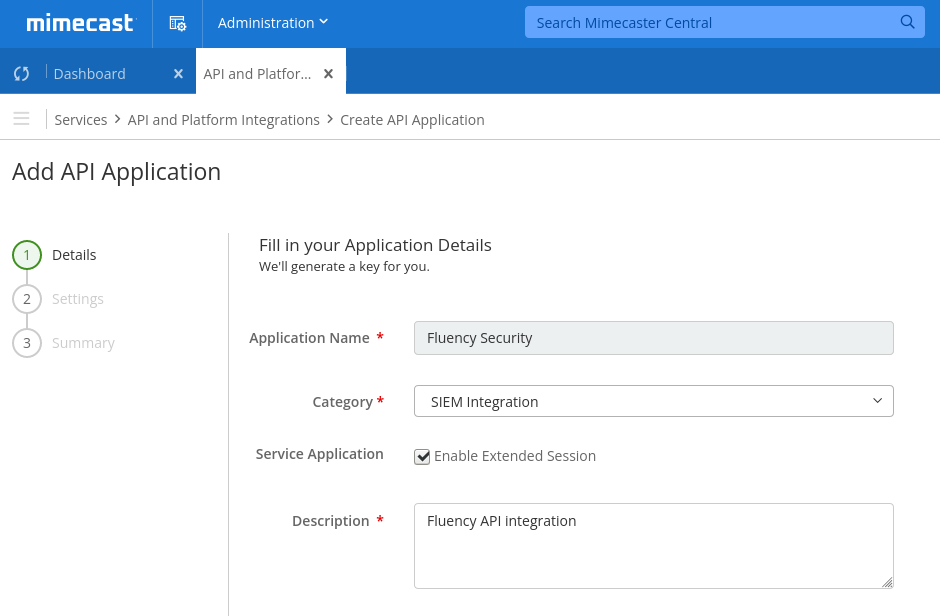
Select "SIEM Integration" for the category. Check the box to "Enable Extended Session". This step is needed to ensure that the API access keys will never expire.
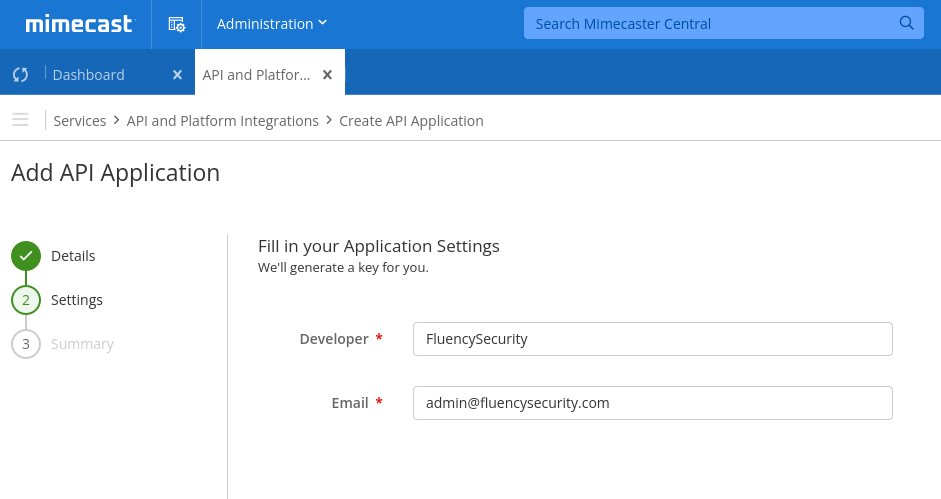
Next, add the following information:
- Developer: Add the name of the application's developer.
- Email: Add the email address of the application's developer.
Any value should work for these fields. For instance:
**Developer**: FluencySecurity
**Email**: [email protected]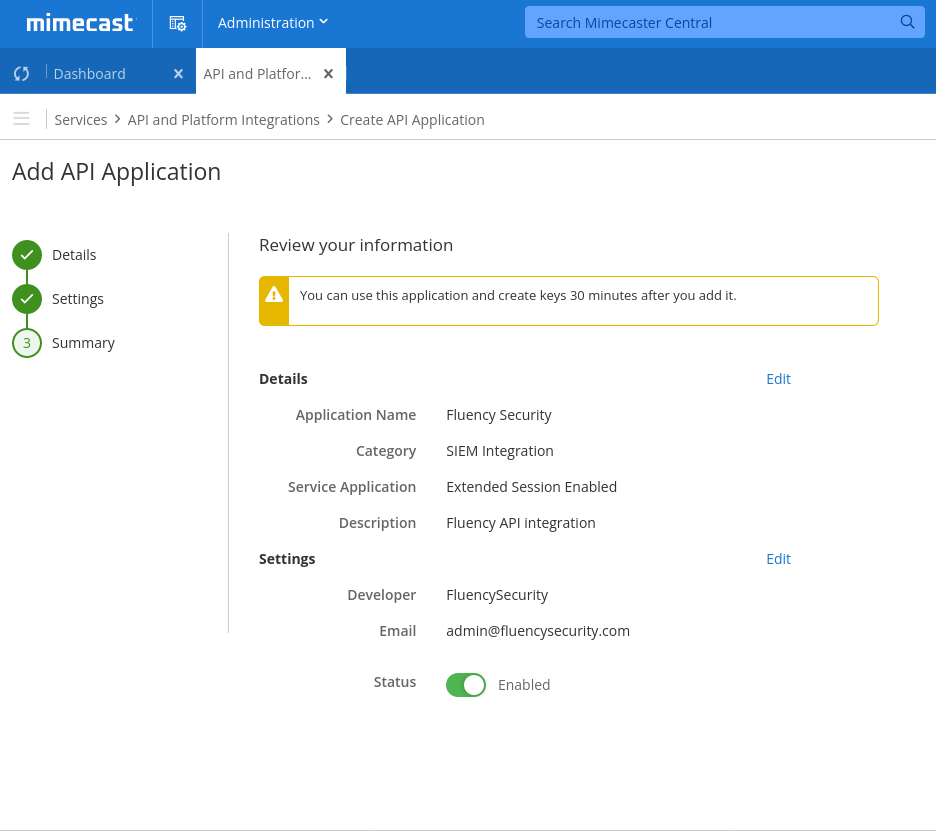
The last window allows you to review your information before you add the API application. Review the fields to make sure everything is correct, then click the blue "Add" button to save the application.
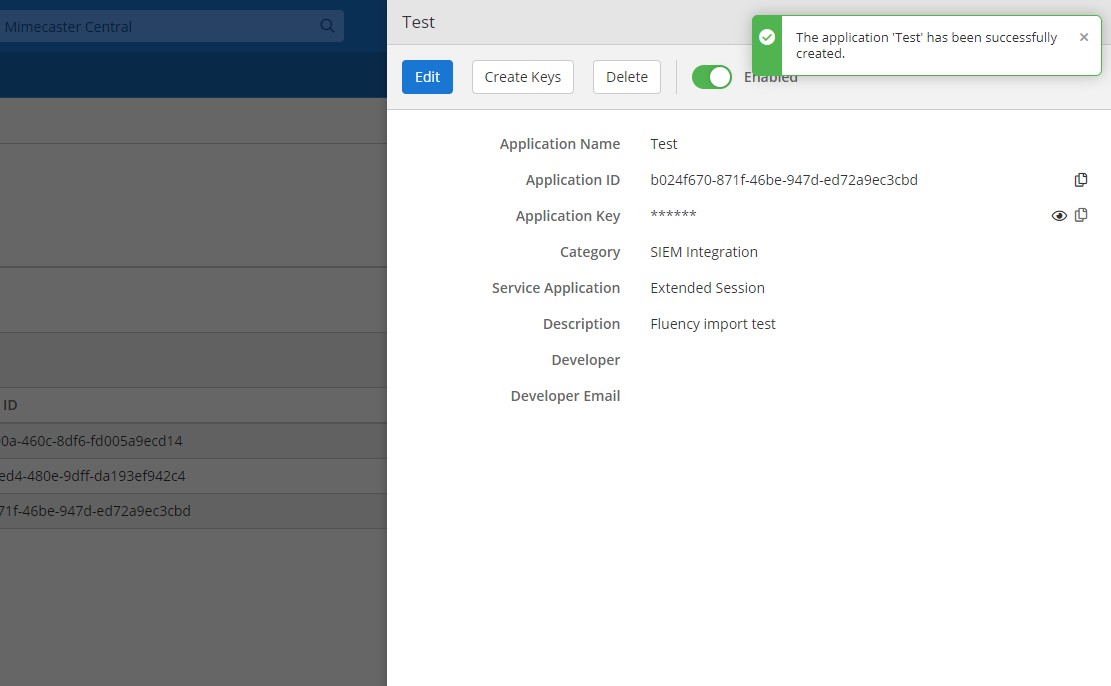
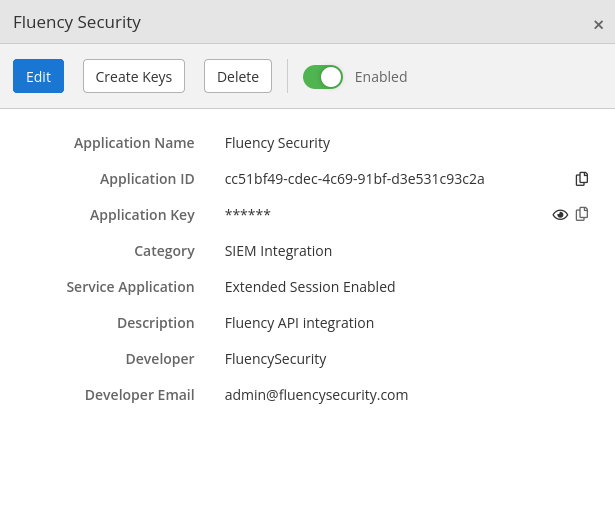
After saving, you will be redirected back to the API and Platform Integrations page, with a summary box for the new application on the side and a message confirming its creation. The Application ID and Application Key can be obtained from this summary box. Click the eye icon to view the key and click the paper icon to copy either one to the clipboard.
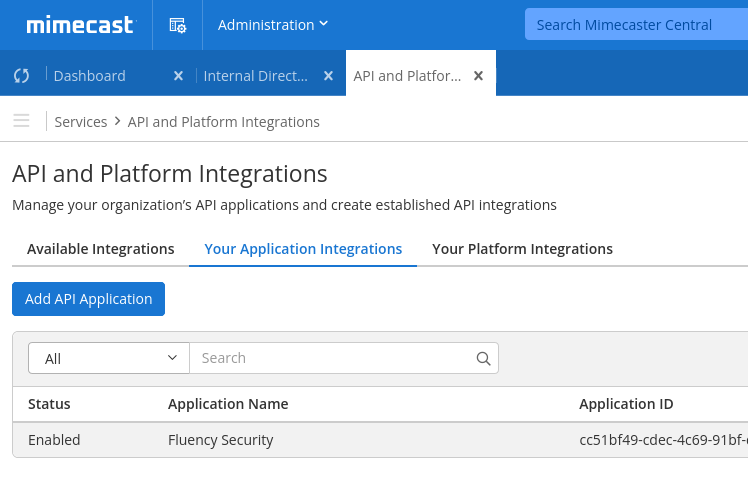
The new API application will appear in the table.
Note: There is a 30 minute wait after creating the new application before you are able to create keys.Enabling Logging
Click the "Administration" menu again, navigate to the "Account" tab, and select "Account Settings."
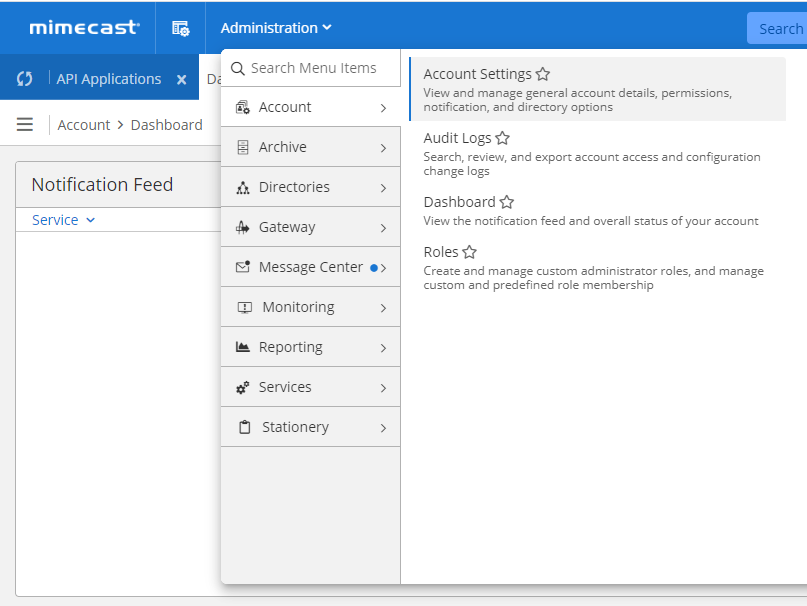
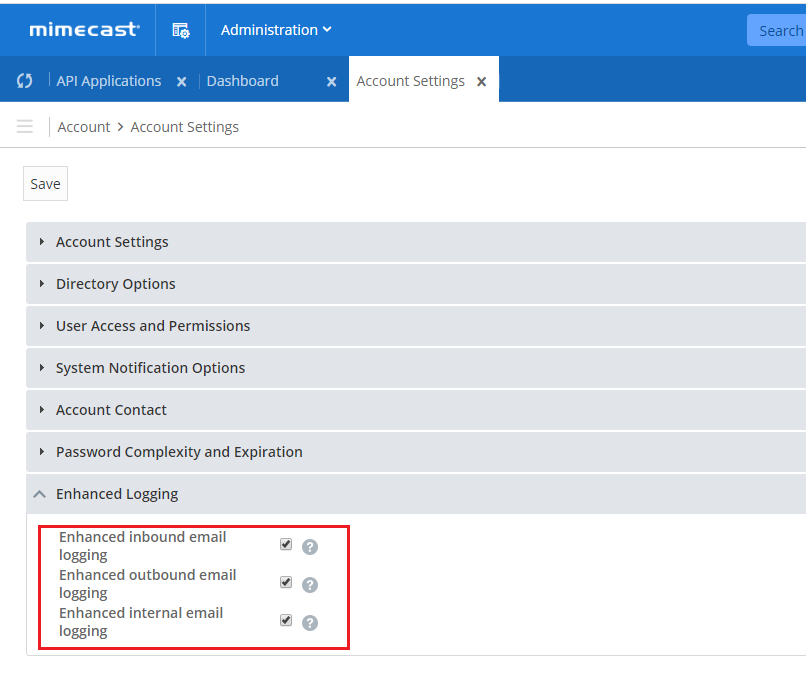
This will open a new tab for the "Account Settings" page. Select the last tab, "Enhanced Logging." Once the menu opens, select the check-boxes for all the options.
Creating Application Keys
Return to the API and Platform Integrations page. Navigate to the Application Integrations page. At the end of the row with each application is a "..." button. Click this button for the desired application and select "Create Keys" from the drop down menu that appears.
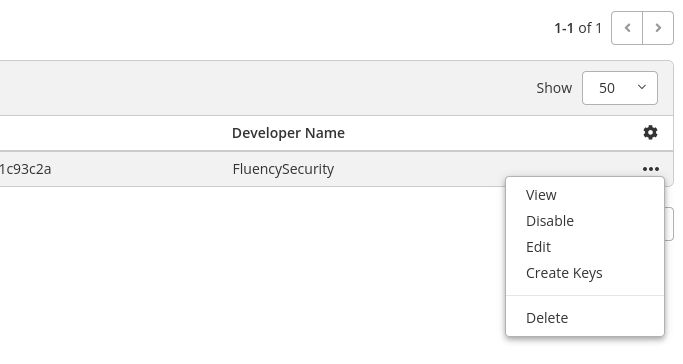
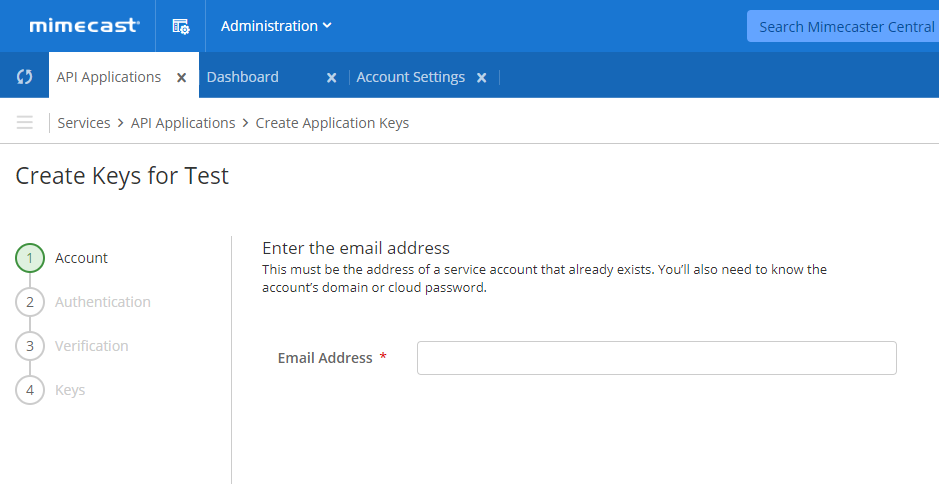
Enter the email address associated with the Basic Administrator Mimecast account. In most cases, this is also the address shown in the top right corner.
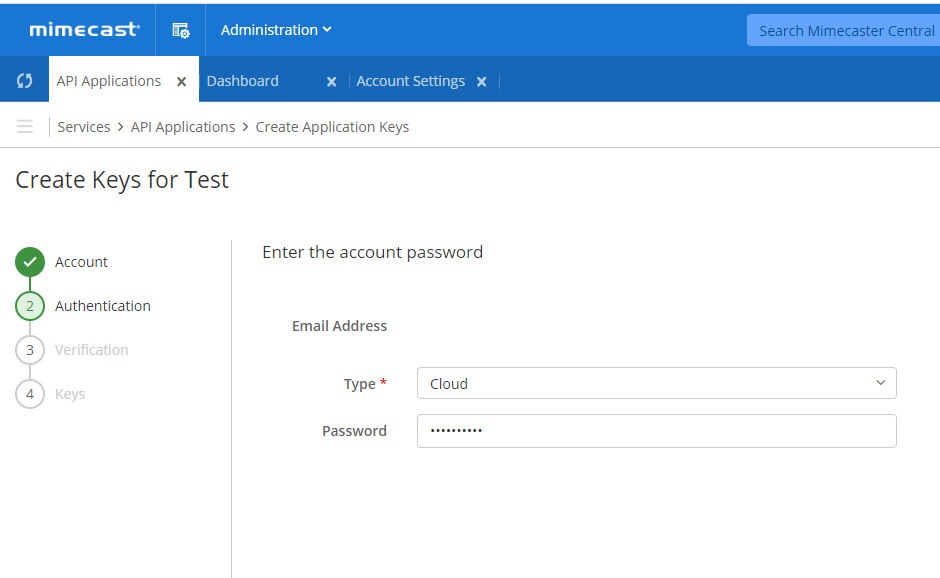
You will then be prompted to select the type of account (in this case: Cloud) and enter the password for the account.
You may be asked to complete the multi-factor authentication.
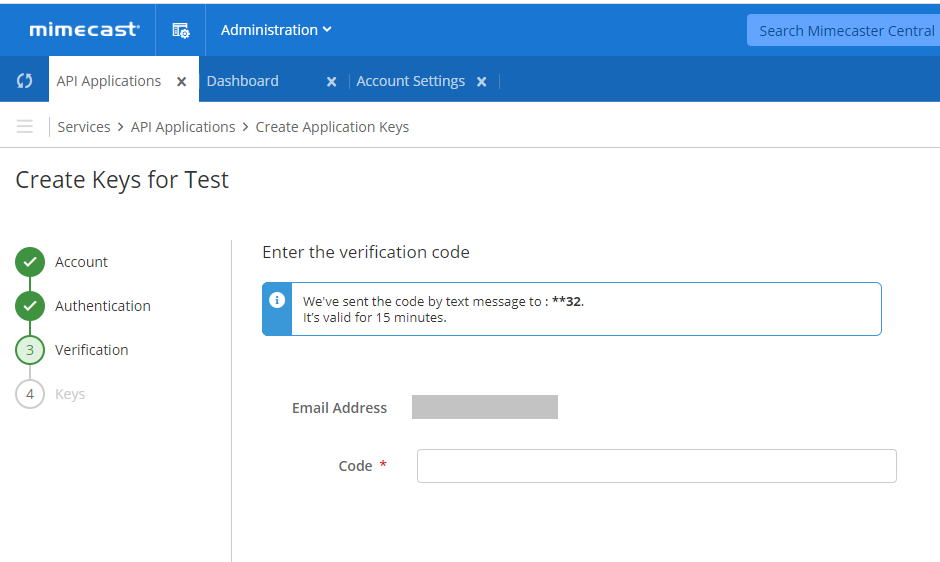
After verification, two keys will be provided: an access key and a secret key. You will need both to set up the Mimecast import. Click the eye icon to view the key and click the paper icon to copy the key to the clipboard.
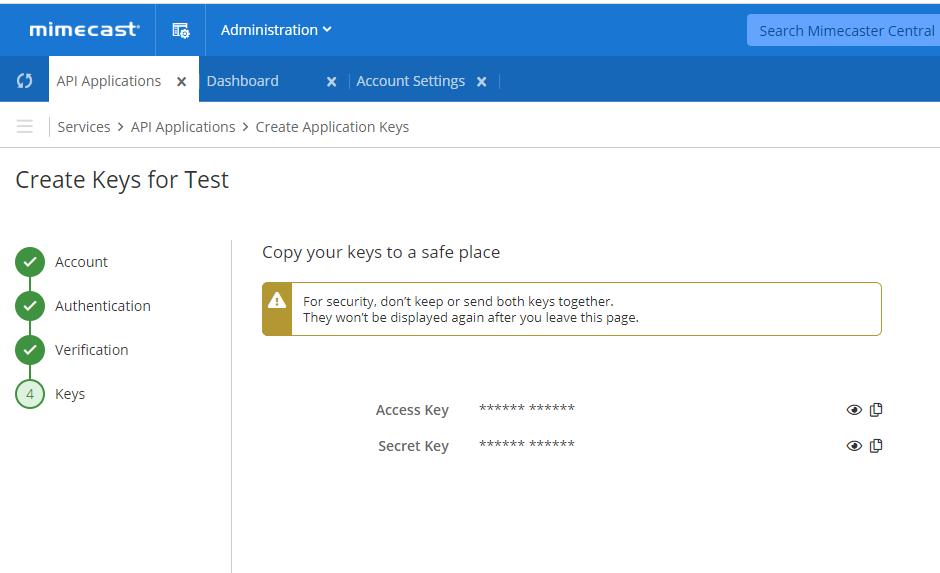
Note: Once you navigate away from this page, you will no longer be able to view the keys.Fluency Integration Configuration
Log into Fluency, and navigate to the Integrations page under the Platform section of the main menu.
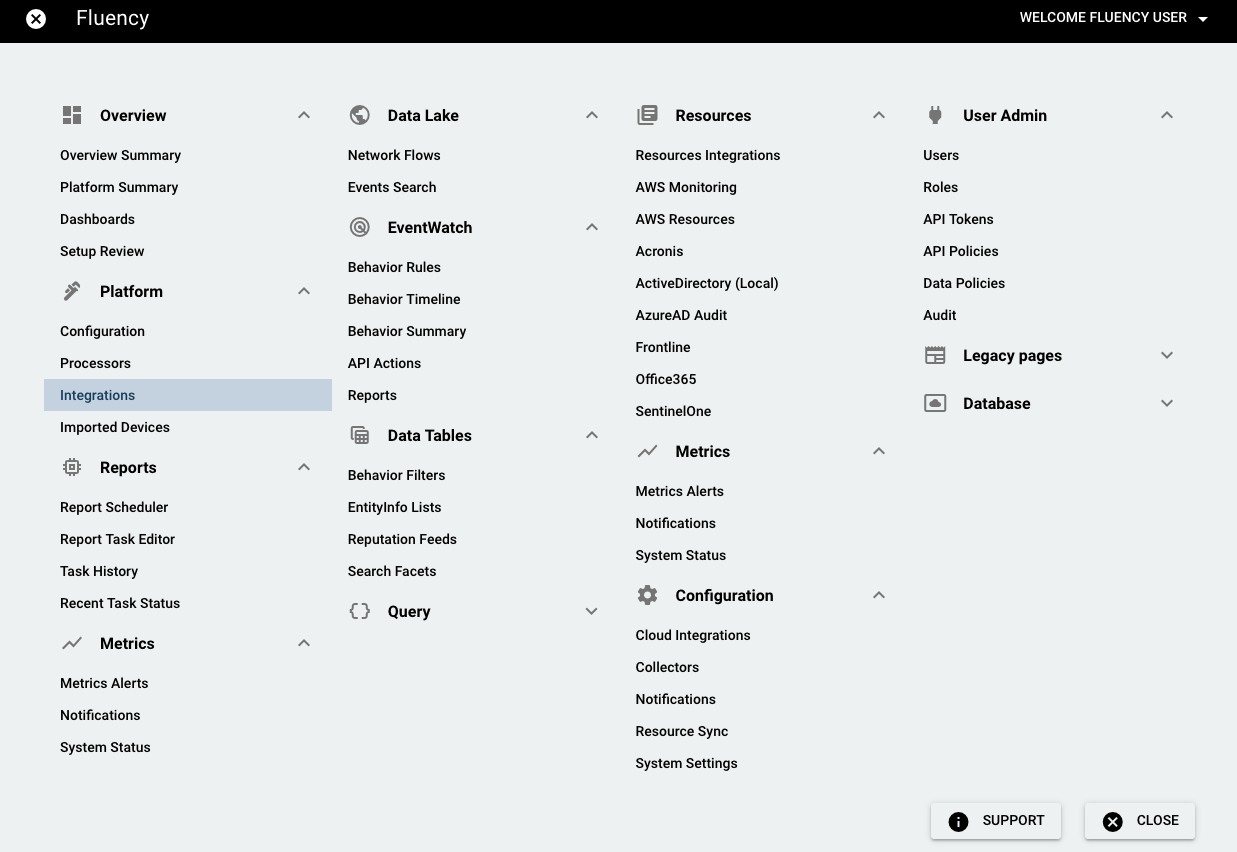
On the Integrations page, go to the New Integrations tab and choose the Mimecast integration, under Email Audit and Protection.


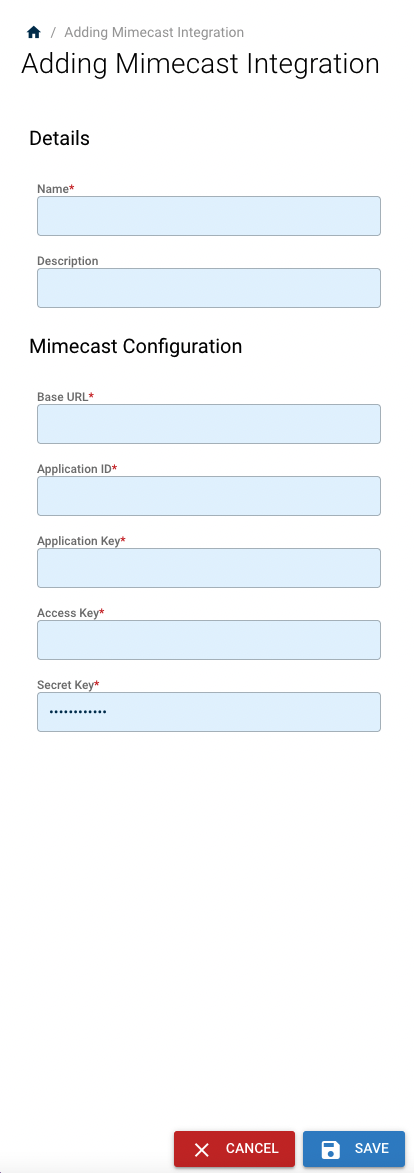
On the left-side panel, once you have all the application information from instructions above, paste it into each field of the import creation form. Click "SAVE" to save this configuration.
Appendix
For more information on using Mimecast, vendor documentation can be found at:
https://community.mimecast.com/s/article/Managing-API-Applications-505230018https://www.mimecast.com/tech-connect/documentation/tutorials/downloading-siem-logs/
Updated 9 months ago
