AWS CloudTrail (Manual)
AWS CloudTrail is a service that logs AWS account auditing data to a new/selected AWS S3 (Simple Storage Service) bucket. Fluency has the ability to collect and store this data in a searchable, centralized location, allowing correlation with other data streams.
AWS S3 buckets has integration with AWS SQS (Simple Queue Service), by way of Event Notifications. Fluency will make use of this integration to collect account auditing data as they arrive in AWS S3.
CloudTrail Integration (Manual Set-up/Configuration)
First, a CloudTrail will be created and configured to send logs to an AWS S3 bucket. Then the bucket will be configured to send Event Notifications to an SQS queue. Finally, Fluency will read the SQS URL to determine the location of the logs in S3.
Follow the instructions in the next sections to create and configure AWS CloudTrail for use with Fluency.
This guide addresses the procedures required to export AWS CloudTrail logs to Fluency. For more detailed information regarding AWS usage, refer to the official vendor documentation.
Official AWS documentation:
For complete instructions on using AWS CloudTrail, you may also visit the Official AWS Documentation:
https://aws.amazon.com/documentation/cloudtrail/
https://docs.aws.amazon.com/awscloudtrail/latest/userguide/cloudtrail-create-and-update-a-trail.html
Setting up a CloudTrail
Creating a CloudTrail and sending log to an S3 Bucket
Navigate to the CloudTrail section of the AWS Management Console and create a CloudTrail.

Pick a name for the trail. (By default, this trail is applied to all regions available to your account.)
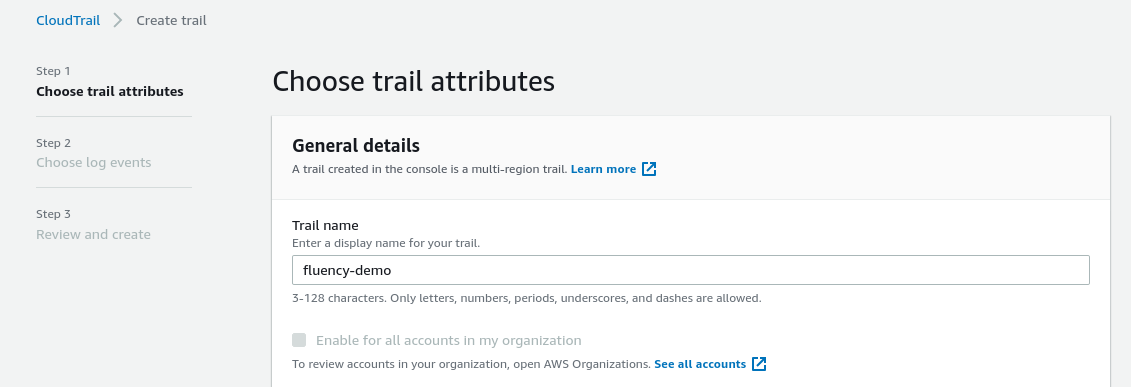
Under the "Storage location" section, create/choose an S3 bucket for this trail. It is suggested to create a new dedicated S3 bucket for Fluency to access. Make a note of the bucket name, as it will be used in a later step.

Additionally, uncheck the “Enabled” box to disable Log file encryption. (Instructions for using encryption are provided in the AWS Documentation link above.)
Click on the "Next" button, to continue to the next section to choose the event types that are to be logged.
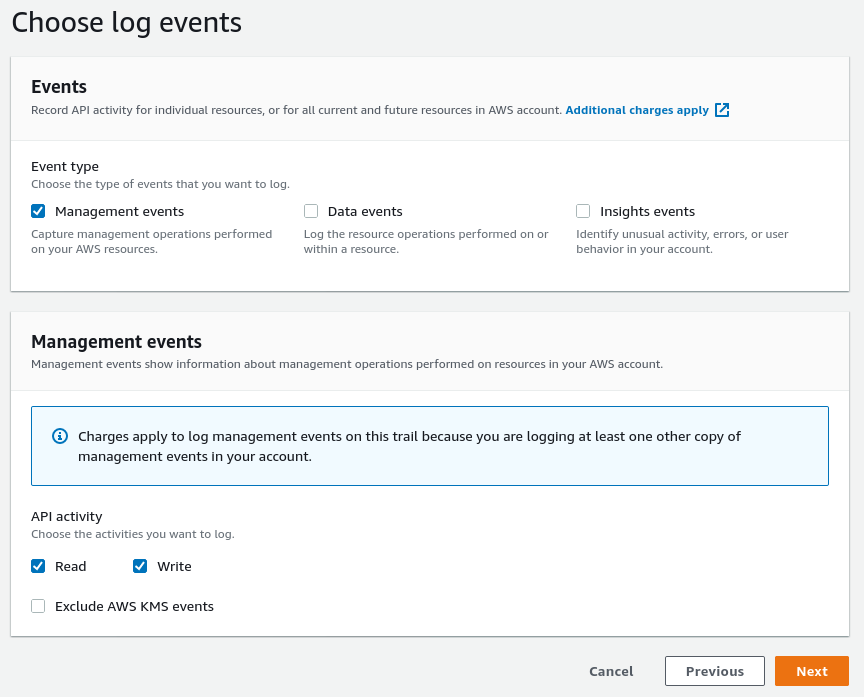
Select the "Management events", choosing both “Read” and “Write” events.
Click on the “Next” button to review settings, and then the "Create trail" button to finish (not shown). The CloudTrail, and S3 bucket should now be created.
AWS SQS
Creating a SQS Queue
Setup a SQS queue to be the recipient of event notifications from the CloudTrail S3 Bucket created above. Fluency will then poll this queue for the S3 location to fetch the log files.
Create a SQS queue from the AWS web console.
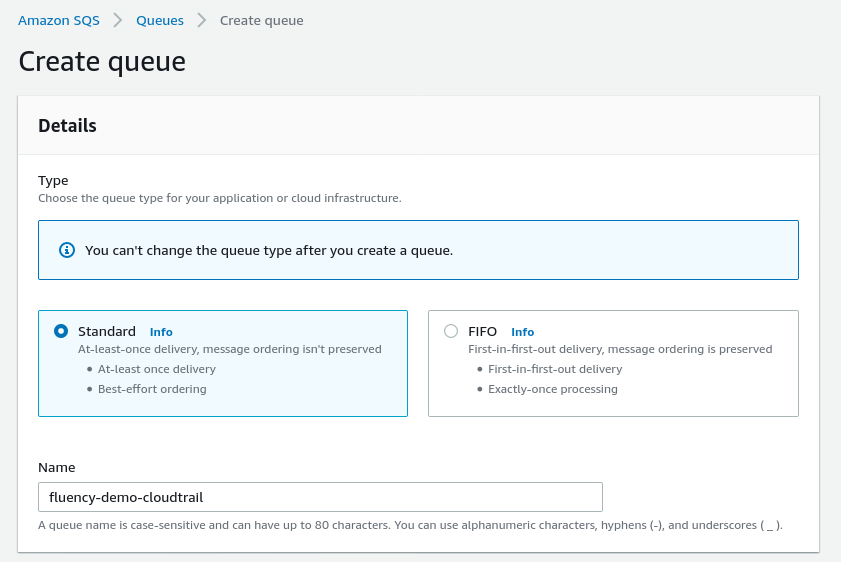
Choose a name for this queue. Select the “Standard” queue type.
Scroll down to the Access Policy section. Choose the “Advanced” method to define the Access Policy via a JSON object.
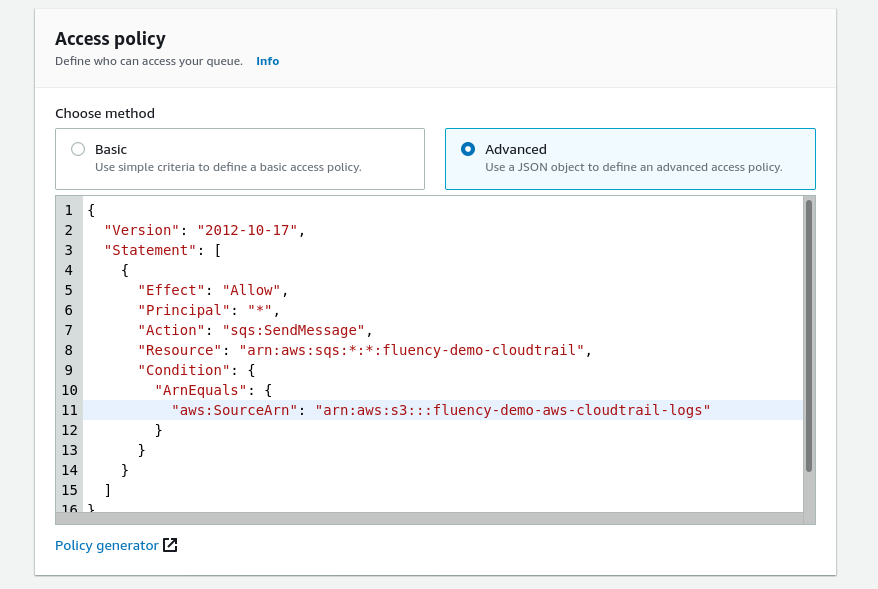
Use the Access policy JSON object shown below, replacing the (values) in the “Resource:” and “Condition:ArnEquals:” sections with the SQS queue name (defined above) and the S3 bucket name (from the previous section) respectively.
Access policy
{
  "Version": "2012-10-17",
  "Statement": [
    {
      "Effect": "Allow",
      "Principal": "*",
      "Action": "sqs:SendMessage",
      "Resource": "arn:aws:sqs:*:*:<aws-sqs-queue-name>",
      "Condition": {
        "ArnEquals": {
          "aws:SourceArn": "arn:aws:s3:::<aws-s3-bucket-name>"
        }
      }
    }
  ]
}
Click on the "Create queue" button to finish. The SQS queue should now be created.
AWS S3
Configuring S3 Bucket Event Notification
The next step involves configuring the CloudTrail S3 bucket used/created to send Event Notifications to the SQS queue created in the previous section.
Navigate to the S3 section of the AWS Management Console. Select the S3 Bucket used for the CloudTrail. Select the “Properties” tab.

Scroll down to the “Event notifications” section.

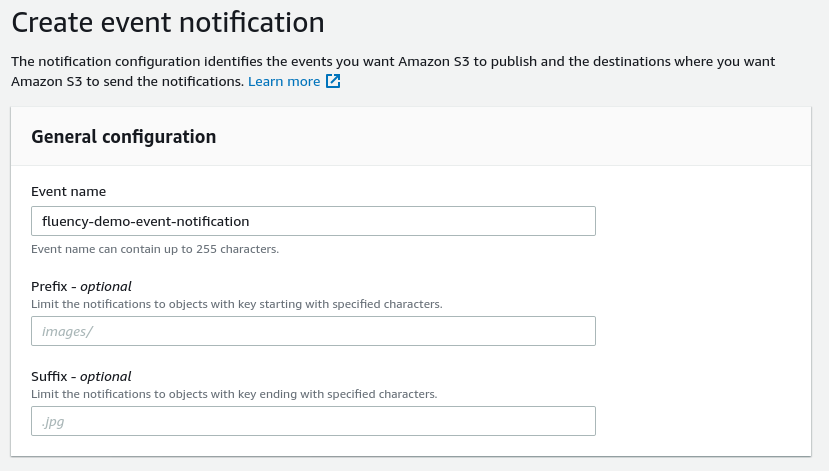
Click the “Create event notification” button to set up a new Event Notification. Provide an “Event name” for this item.
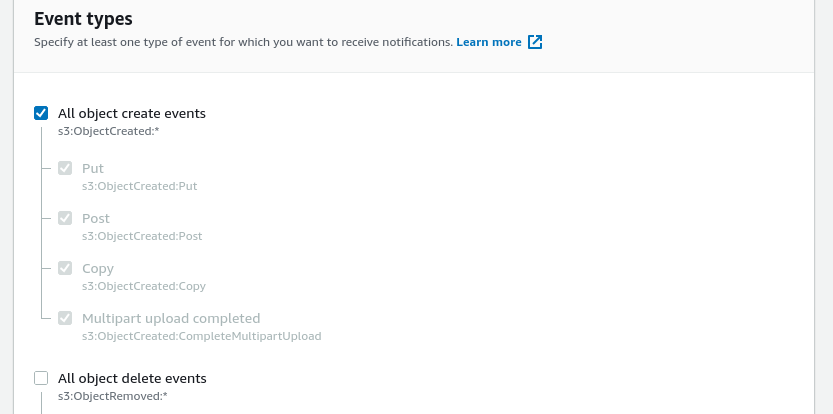
In the Event Type section, select the “All object create events” checkbox. Leave the other types un-selected.
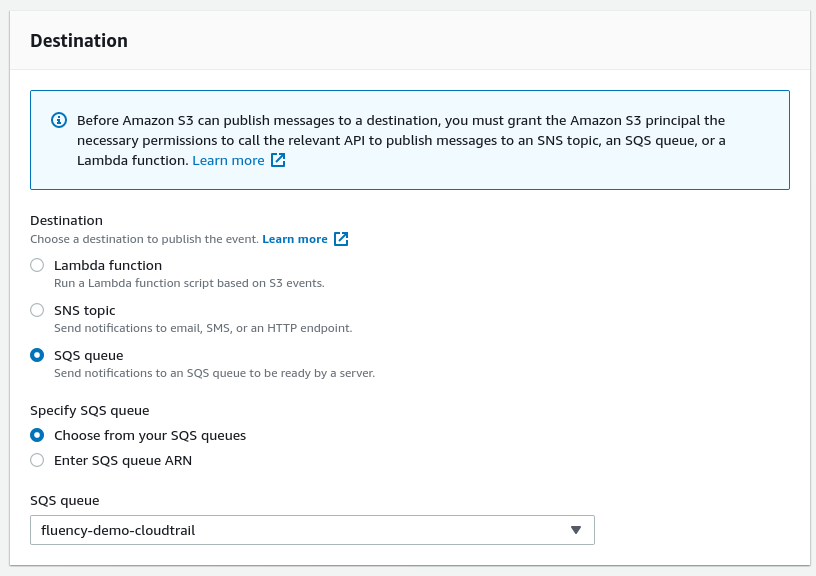
Configure the “Destination” to be an “SQS queue” and select the queue created in the previous step.
Click on the "Save changes " button to finish.

Make a note of the URL field in the Details section. It will be used in a later step.
AWS IAM (AWS User)
Fluency will access AWS resources via an IAM (Identity and Access Management) user. The access rights of this user will vary, depending on the services that send data to Fluency. In this section, an IAM user will be created. Additional permissions will be added to this user in the following section as needed.
For complete instructions on creating AWS IAM users, you may also visit the Official AWS Documentation: https://aws.amazon.com/documentation/iam/.
Creating a new IAM user for Fluency
Navigate to the IAM section of the AWS Management Console.

Add a new IAM user for Fluency. For Access Type, select the "Programmatic access" option.
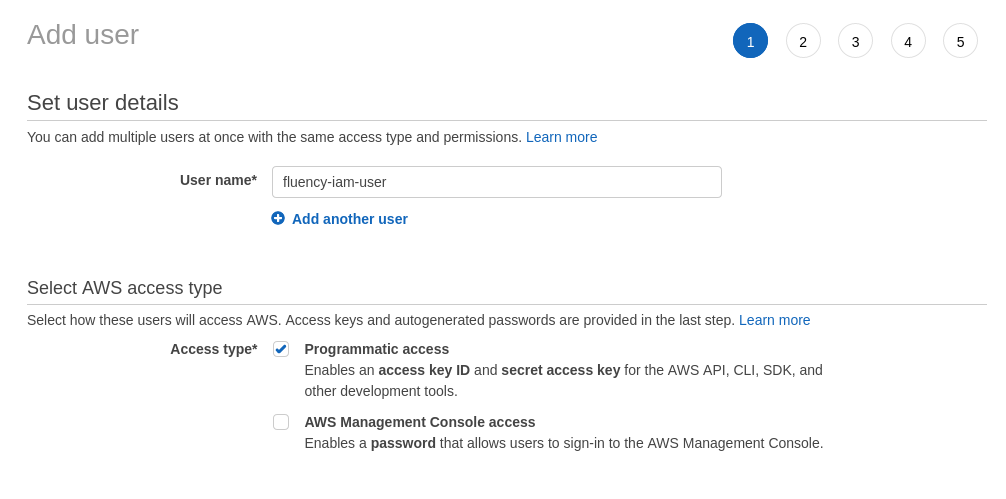
Click through and continue to add the IAM user without any permissions. These will be added in the next section.
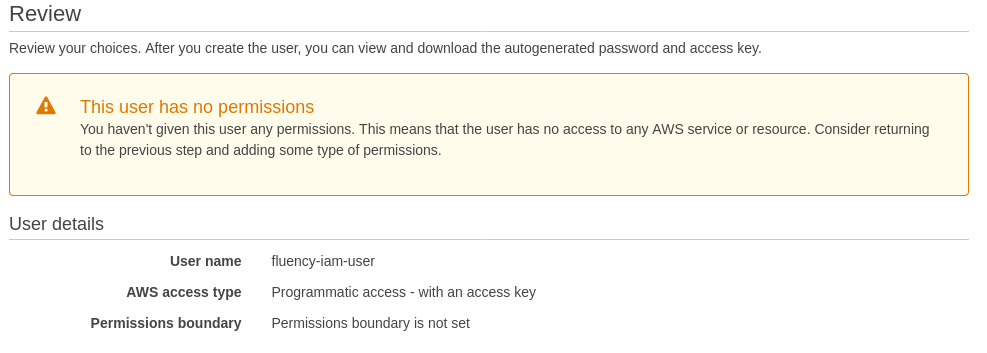
NOTE: Make a note of the Access key ID and the Secret access key. These credentials will be used by your Fluency appliance to access your AWS data.
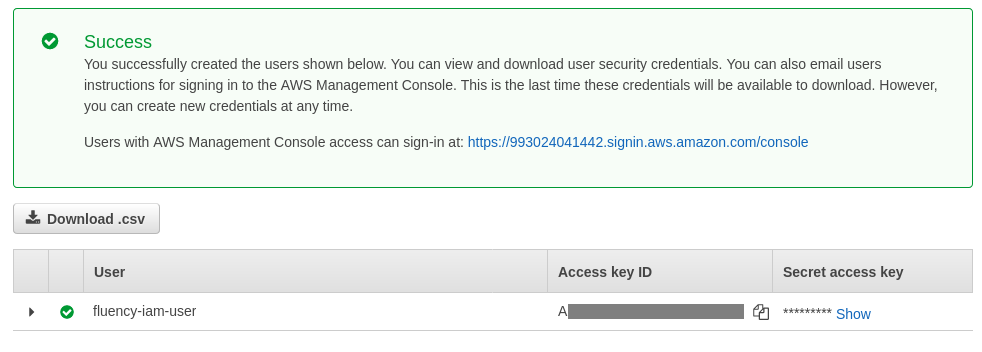
Click on the "Close" button to exit. The IAM user should be created.
Adding permissions to the IAM user
To integrate with AWS CloudTrail, your Fluency appliance will need access to AWS S3 and AWS SQS.
Navigate to the IAM section of the AWS Management console. In the "Users" tab, select the IAM user created in the previous step to modify.

Choose the Permissions tab and select the "+ Add inline policy” option.
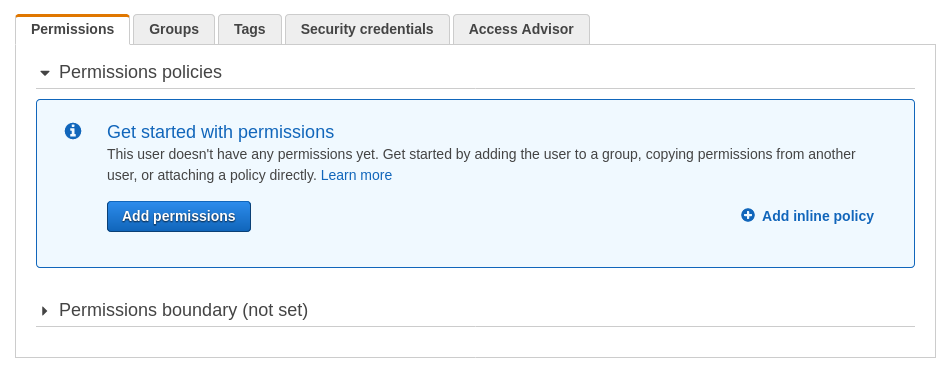
In the Create policy page, navigate to the JSON tab.

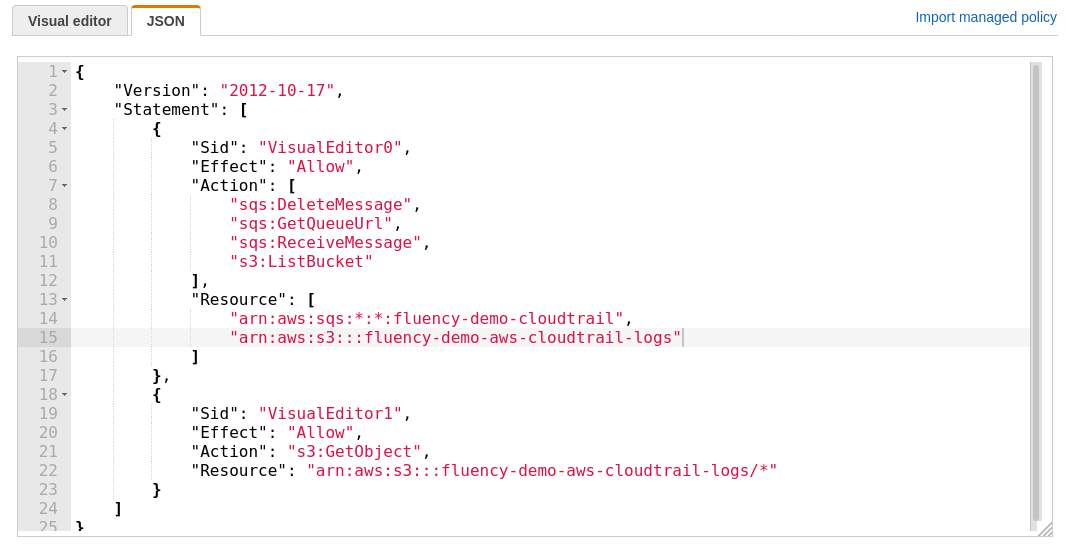
Use the editor to modify the policy. The required JSON object is shown on the following page. This file is also available for download at the following link: https://s3.amazonaws.com/SecurityDo/public/in-line-policy.json.
In the in-line policy JSON object shown below, replace the three (values) in the “Resource:” sections with the SQS queue name (once) and the S3 bucket name (twice), both from the previous sections, respectively.
IAM in-line policy
{
    "Version": "2012-10-17",
    "Statement": [
        {
            "Sid": "VisualEditor0",
            "Effect": "Allow",
            "Action": [
                "sqs:DeleteMessage",
                "sqs:GetQueueUrl",
                "sqs:ReceiveMessage",
                "s3:ListBucket"
            ],
            "Resource": [
                "arn:aws:sqs:*:*:<aws-sqs-queue-name>"",
                "arn:aws:s3:::<aws-s3-bucket-name>"
            ]
        },
        {
            "Sid": "VisualEditor1",
            "Effect": "Allow",
            "Action": "s3:GetObject",
            "Resource": "arn:aws:s3:::<aws-s3-bucket-name>/*"
        }
    ]
}
Click on the “Review policy” button.
On the next page, name and review the policy.
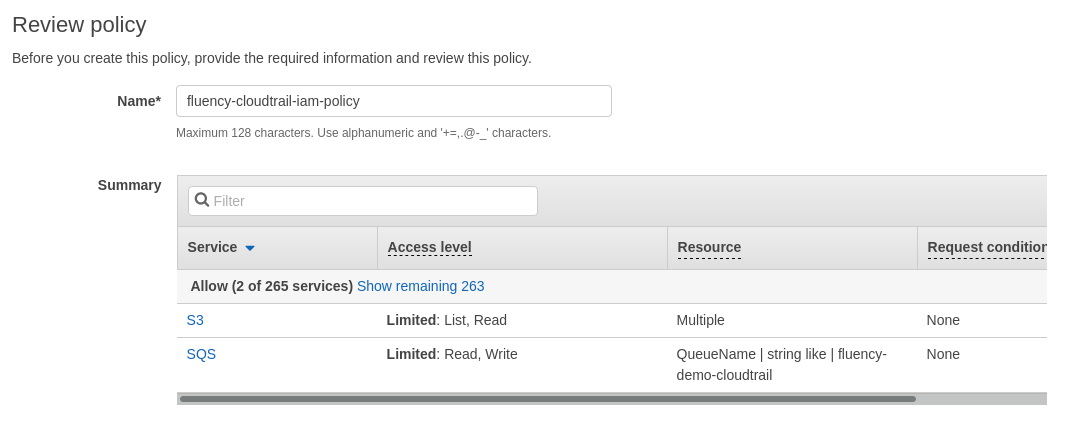
Click on the "Create policy" button to finish.
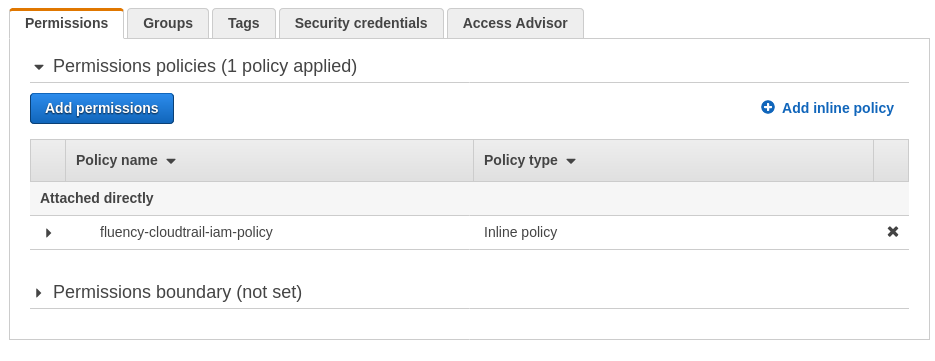
The IAM user permissions should now be added.
Fluency Interface Configuration
Login to the Fluency Cloud portal: https://(companyname).cloud.fluencysecurity.com.
Open the dropdown menu and choose the Integrations option under the Platform section.
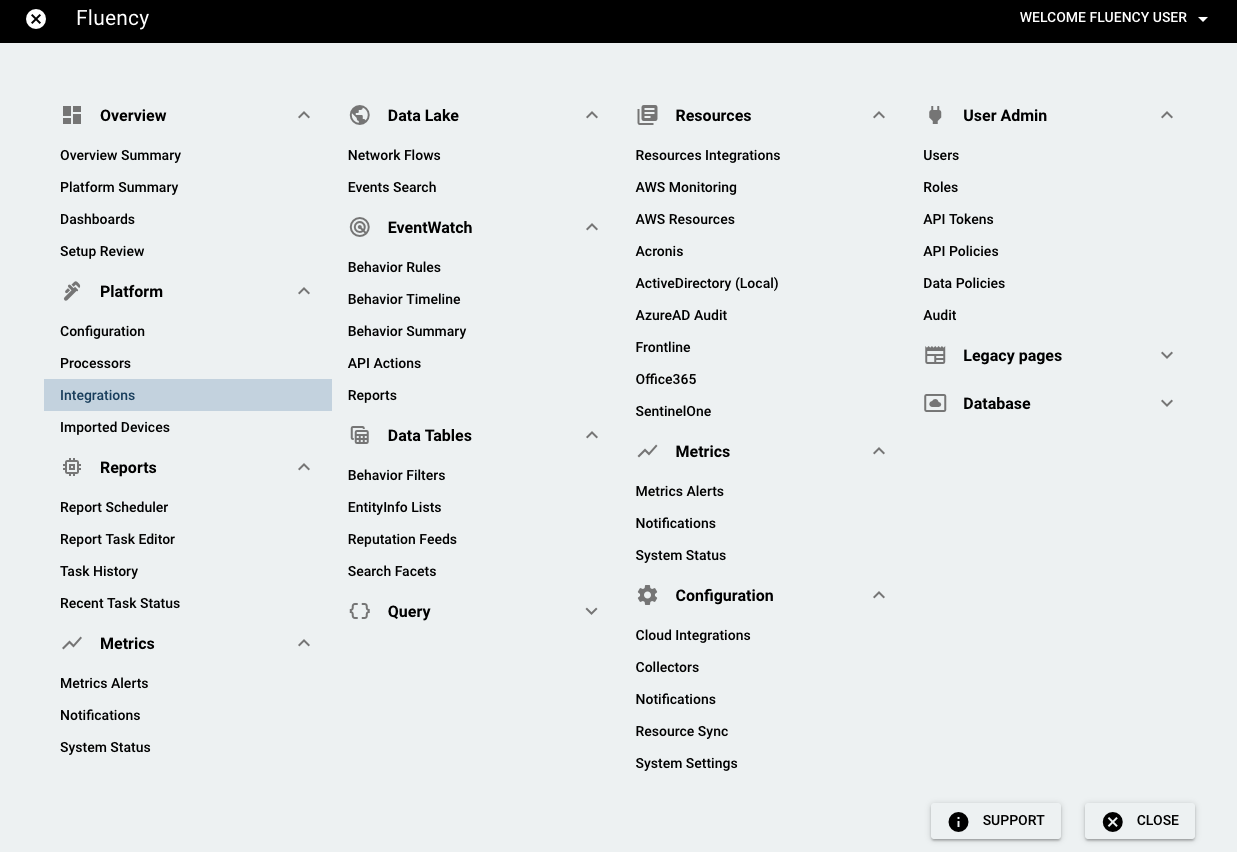
On the Integrations page, go to the New Integrations tab. AWS S3 Bucket, AWS S3 w/ SQS and AWS User integrations are under "Cloud Infrastructure (IaaS)".


Take AWS S3 Bucket as an example: Click the icon, and enter the required information on the left-side panel,:
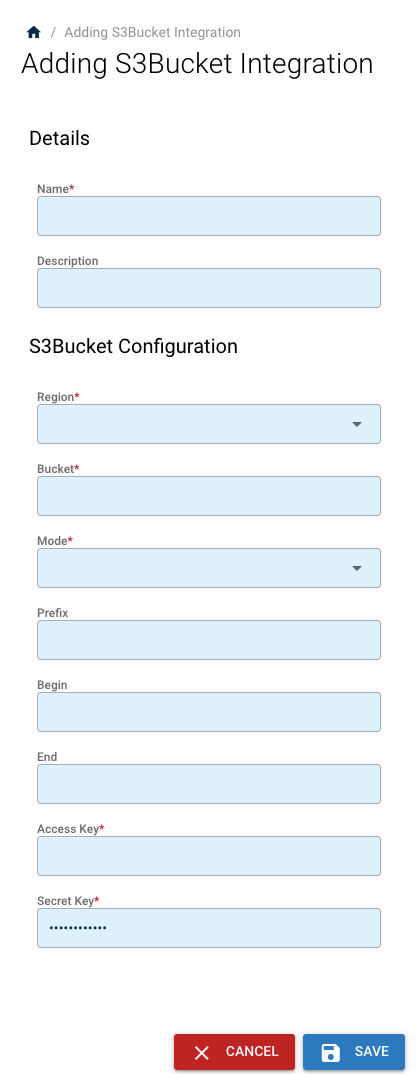
After clicking "SAVE", you'll see the newly added integration under the Existing Integrations.
Updated 9 months ago
